Follow Me On Social Media!

How to Make Self Rising Flour: Easy & Homemade Magic
Introduction to How to Make Self Rising Flour
When you delve into the world of baking, self-rising flour emerges as a true kitchen superstar, simplifying your preparation while delivering fluffy and light results. Its magical combination of flour, baking powder, and salt makes it the go-to choice for quick breads, pancakes, and biscuits, allowing you to focus on creativity rather than measuring multiple ingredients. Imagine waking up on a Saturday morning, the sun streaming through your kitchen window, and the thought of homemade biscuits rises to the forefront of your mind. With self-rising flour, you can whip up those fluffy delights in a flash, bringing warmth to your home and smiles to your family’s faces.
What makes self-rising flour a kitchen essential?
Navigating the myriad of baking recipes can sometimes feel overwhelming, especially when it comes to understanding various types of flours. Self-rising flour eliminates much of that complexity. It’s especially useful for those of you busy young professionals who want to save time without sacrificing quality. Here are a few reasons why incorporating this flour into your culinary arsenal is a smart move:
-
Convenience: Because it already contains baking powder and salt, you can skip several steps in measurement and mixing. This is perfect for spontaneous baking sessions or when you’re short on time.
-
Versatility: Not just for biscuits, self-rising flour works wonders with pancakes, muffins, and even certain savory dishes. Think about it—fluffy pancakes on a lazy Sunday or quick muffins for brunch guests become easily attainable.
-
Consistent Results: Using a mix that has pre-measured leavening agents can lead to more reliable outcomes. You won’t have to worry about under-leavened dough or with too much salt ruining your recipe.
By learning how to make self-rising flour from scratch, you can ensure you always have this kitchen essential at your fingertips. Plus, it gives you the freedom to control the ingredients, elevating your baking game. Ready to get started? Let’s dive into the simple process of creating your very own self-rising flour!

Key Ingredients for How to Make Self Rising Flour
Creating your own self rising flour at home is not just a clever hack; it’s a game changer for your baking adventures. This method saves time and ensures freshness, giving your baked goods an extra boost. Here’s a breakdown of the essential ingredients you need:
-
All-Purpose Flour: This serves as the foundation for your self rising flour. The beauty of all-purpose flour lies in its versatility; it works well in nearly any recipe.
-
Baking Powder: This is the star ingredient that helps baked goods rise beautifully. Using a balanced ratio of baking powder (typically 1.5 teaspoons per cup of flour) is key to achieving that fluffy, light texture we all love.
-
Salt: A pinch of salt enhances the flavor of your dough. It’s surprising how a small amount makes such a big difference!
With just these three ingredients, you’ll have everything you need to make your own self rising flour, paving the way for delightful recipes from cakes to biscuits. Enjoy your baking journey!
Why You’ll Love This Recipe
Learning how to make self rising flour is a small yet empowering kitchen skill that can transform your baking experience. Imagine standing in your kitchen, ready to whip up a delightful batch of biscuits or a cake, only to discover you don’t have any self-rising flour. Panic sets in, but fear not! With just two pantry staples—all-purpose flour and baking powder—you can create a magic blend that opens up endless baking possibilities.
Here’s why this simple recipe will become your new go-to:
-
Quick and Easy: It takes less than five minutes to whip up your self-rising flour at home. No special equipment is needed; just grab a mixing bowl and a whisk!
-
Customizable Ratios: Adjust the baking powder to suit your recipe for a little extra rise or to replace the flavor of a different flour. You’re in control of your baking destiny!
-
Freshness Assurance: Making it yourself means you’re using the freshest ingredients possible. Plus, you avoid any unnecessary additives often found in store-bought flour.
-
Savings Worth Noting: If you bake often, making your own self-rising flour can save you money in the long run. You might end up using it more than you think!
Enjoy the satisfaction and flexibility of knowing exactly what you’re putting into your flour mix. Happy baking!

Variations of Self Rising Flour
Creating self rising flour can be a game changer for bakers who appreciate the convenience of having leavening agents already mixed in. But did you know that there are variations of this essential ingredient? Let’s explore a few!
Whole Wheat Self Rising Flour:
If you’re aiming for a heartier texture and more nutrients, whole wheat self rising flour is an excellent choice. Just substitute whole wheat flour for the all-purpose flour in the self rising mix. This option provides a rustic flavor that pairs beautifully with breads and muffins.
Gluten-Free Self Rising Flour:
For those on a gluten-free diet, creating a gluten-free version of self rising flour is easy! Combine gluten-free all-purpose flour with baking powder and salt in the same proportions as the traditional recipe. This allows you to bake fluffy pancakes or fluffy cupcakes without the gluten.
Cake Flour Self Rising Flour:
If your baking projects often lean towards delicate cakes, consider using cake flour to make your self rising flour. This variation yields a finer crumb and enhances the lightness and texture of cakes, perfect for creating that melt-in-your-mouth sensation.
Herbed Self Rising Flour:
Want to add a twist to your baking? Try mixing in dried herbs like rosemary or thyme to your homemade self rising flour. This version is fantastic for savory scones or biscuits, bringing an aromatic touch to your dishes.
Remember, each variation can bring out unique flavors and textures in your baking. So whether you’re working on biscuits or pancakes, experimenting with these options can lead to delightful discoveries in your kitchen!
Cooking Tips and Notes for Self Rising Flour
Creating and using self rising flour is a game changer in the kitchen. Not only does it simplify your baking process, but it also ensures your baked goods rise perfectly every time. Here are some helpful tips and notes to keep in mind:
Understanding Your Ingredients
-
Flour: Use a good quality all-purpose flour as your base. If you mix in the right amount of baking powder and salt, you can make self rising flour that rivals store-bought options.
-
Baking Powder: Ensure your baking powder is fresh. Old baking powder can lead to flat results, which can be disappointing. A simple test? Drop a teaspoon in warm water; if it bubbles up vigorously, it’s still good!
-
Salt: The right amount of salt enhances flavors, but too much can overpower your dish. Stick to regular table salt for uniform texture.
Mixing Wisely
When learning how to make self rising flour, measure carefully! For every cup of flour, combine 1 ½ teaspoons of baking powder and ¼ teaspoon of salt. Mix thoroughly to ensure even distribution.
Storage Tips
Once you’ve prepared your self rising flour, store it in an airtight container to keep it fresh. A cool, dry place is ideal. Remember to label it with the date, as homemade mixes can lose potency over time.
Using these tips will not only enhance your baking but will also give you confidence in your abilities. Happy baking!

Serving Suggestions for Self Rising Flour
Exploring the versatility of self rising flour can open up a world of delicious possibilities. This magical blend of flour, baking powder, and salt is your go-to ingredient for creating fluffy baked goods with minimal effort.
Classic Biscuits
One of the first serving suggestions you might try is classic biscuits. Just mix with buttermilk, fold the dough, and bake. The result? Pillowy, golden biscuits perfect for breakfast or as a side to your favorite meal.
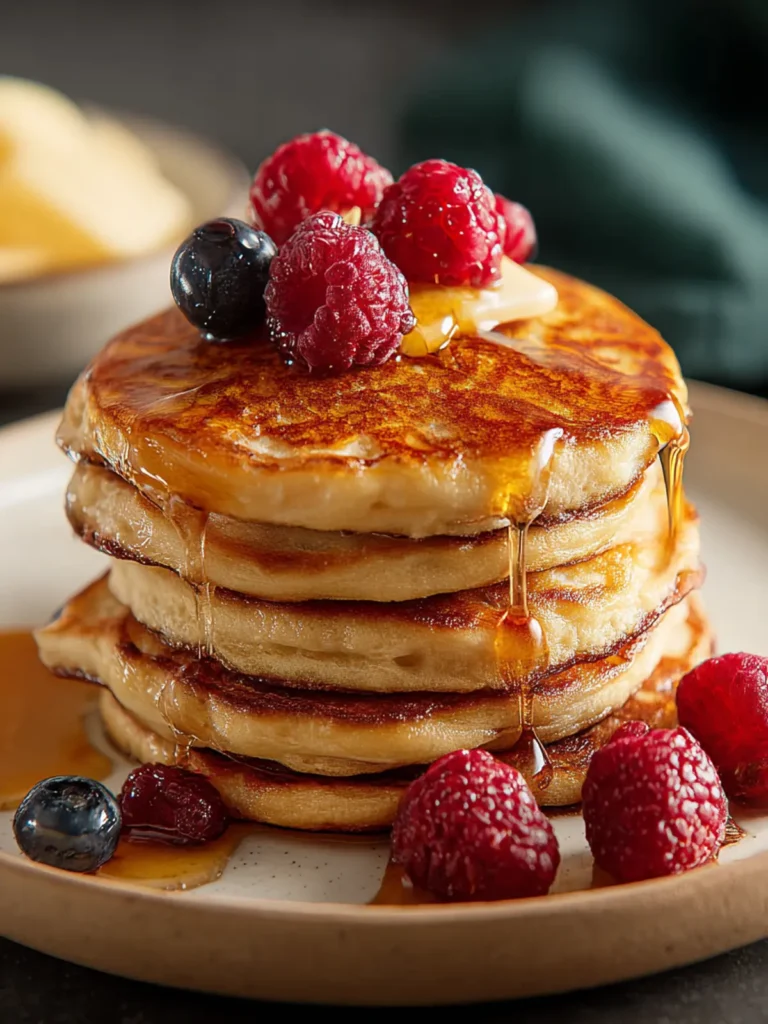
Pancakes or Waffles
Feeling like a weekend treat? Whip up some pancakes or waffles! The texture is unbelievably light, and you can customize them with your favorite add-ins like blueberries or chocolate chips.
Quick Bread
Another delightful option is quick bread. Simply combine self rising flour with mashed bananas or zucchini, and you’ll have a moist loaf baking away in no time. Serve it warm with a pat of butter for a comforting snack.
Tasty Muffins
Why not indulge in muffins? With the ease of self rising flour, you can create sweet or savory muffins that are ideal for breakfast on the go.
Embrace the flexibility of self rising flour; it’s your shortcut to scrumptious baked goodness!
Time Breakdown for Making Self Rising Flour
Preparation Time
Creating your own self rising flour doesn’t take much time at all, with about 5 minutes needed for measuring and mixing the ingredients together. It’s a simple process that rewards you with fresh flour for all your baking needs.
Storage Time
Once you’ve made your self rising flour, you can store it in an airtight container in a cool, dry place. It can stay fresh for up to 3 months, ensuring that you always have some on hand when that baking urge strikes!
Total Time
From start to finish, you’re looking at around 5 minutes for this quick and easy recipe. So, whether you’re baking up a storm or just need some flour on the fly, you’ll have your self rising flour ready in no time!
Nutritional Facts for Self Rising Flour
When you decide how to make self rising flour, it’s essential to understand the nutritional impact of this versatile ingredient. Self-rising flour can add convenience to your baking, but it’s good to know what’s in it!
Calories
A one-cup serving of self-rising flour typically contains around 455 calories. While it’s not excessively high in calories, it’s crucial to be mindful of portion sizes, especially in baked goods that can stack up the calories quickly.
Carbohydrates
Self-rising flour is primarily composed of carbohydrates, with one cup providing about 95 grams. This makes it a great source of energy, but balance is key—pair it with proteins and fibers to create a well-rounded meal.
Sodium
Self-rising flour contains around 1,500 milligrams of sodium per cup. The addition of baking powder gives it a slight sodium content, so be cautious if you’re watching your salt intake. It’s a good idea to check other ingredients later in your recipes to manage sodium levels effectively.
Understanding these nutritional facts will help you make informed choices as you explore recipes that call for self-rising flour, ensuring your creations taste great without compromising your health goals!
FAQs About Self Rising Flour
Understanding self rising flour can be a game changer for your baking adventures. As you delve deeper into the art of baking, you might find yourself with more questions than answers. Here are some of the most frequently asked questions regarding self rising flour, especially when learning how to make self rising flour at home.
Can I use self-rising flour in all recipes?
Self-rising flour isn’t a one-size-fits-all ingredient. While it works wonders in recipes for pancakes, biscuits, and quick breads, it’s essential to avoid using it in recipes that call for yeast or additional leavening agents. The baking powder already present could lead to an overly risen or even collapsed end product. If you enjoy experimenting, consider trying self-rising flour in some of your favorite recipes, but always check the requirements first!
How do I store self-rising flour?
Just like regular flour, self-rising flour should be stored in a cool, dry place. Make sure to close the container tightly after each use to keep moisture out. If you want to keep it fresher for longer, consider refrigerating or freezing it. This can help preserve its efficacy, especially because the baking powder in self-rising flour can lose potency over time when exposed to air.
What happens if I add too much baking powder?
Adding more baking powder than what’s needed can lead to a few baking faux pas. Too much can create a somewhat bitter taste and cause your baked goods to rise too quickly. This may result in a collapse as the structure fails to support itself. If you’re curious about adjusting recipes, it’s best to track the amount you use and stick to the guidelines to achieve that perfect texture!
Conclusion on How to Make Self Rising Flour
In mastering how to make self rising flour, you’ll discover it’s not just about convenience; it’s about unlocking the potential in your baking. By combining all-purpose flour with baking powder and a pinch of salt, you create a versatile ingredient that saves time while ensuring delightful results. This easy mix empowers you to whip up fluffy pancakes or soft biscuits without the need for extra leavening agents. As you start incorporating your homemade self rising flour into recipes, experiment with ratios and expand your culinary repertoire. Dive into your baking adventures with newfound confidence and enjoy the delicious outcomes!
Print
Dry Ingredients Mix
- Total Time: 10 minutes
- Yield: Makes approximately 5 cups of mix 1x
Description
A simple mix for baking that combines flour, salt, and baking powder.
Ingredients
Scale
- 4 cups all-purpose flour
- 1 teaspoon salt
- 2 tablespoons baking powder
Instructions
- Combine all your ingredients in a large mixing bowl, and whisk together, until fully combined.
- Transfer to an airtight container.
Notes
- Ensure the ingredients are well mixed for best results.
- Prep Time: 10 minutes
- Category: Baking
- Method: Mixing
- Cuisine: American
Nutrition
- Serving Size: 1 cup
- Sodium: 570 mg
- Fat: 2 g
- Saturated Fat: 0 g
- Carbohydrates: 120 g
- Fiber: 4 g
- Protein: 12 g